
My inspiration came from this post at Domestic Imperfection. See? Totally gorgeous, right?
Here is my $15 yard sale table. It's just your basic, every day dining room table.

First, I painted the legs of the table. I used primer & paint duo spray paint in white. It took 2 cans to cover the legs and no sanding was required.

Next I(we) sanded down the table top. Sanding was the most time consuming (and messy) part of the project and was a major pain in the rear. Who has two thumbs and an awesome husband who will trade a date night out for a date night in sweating and getting tore up by mosquitos? This girl. Love you hunny! :)

Once the top was completely sanded down, I painted on the stencil. Originally I planned to repeat the stencil over the entire top, but then decided to just do a border because of how busy the design was. I purchased my stencil at Michael's with a 50% off coupon for $5 and used just your basic 79cent acrylic paint in white. I also purchased a stencil foam roller with a 50% off coupon for just a couple bucks. This stencil, made by Folk Art, was really great and had a guide for repeating the design, which made lining it up super easy.

I borrowed stain and polyurethane from my dad and stained the top the next morning. (You could stain same day if you'd like, the acrylic paint dries very fast.) Since this was my first time staining anything, I called the expert, aka my Dad, and had him walk me through the process via FaceTime. I dipped a clean, folded up rag into the stain and wiped down the table, following the grain of the wood. Once it was covered, I took another clean rag and wiped in a circular motion across the entire table. That whole process took about 5 minutes! Don't forget the gloves!

I decided I liked the color with one application and after it dried for several hours, I brushed on a few coats of polyurethane. The whole process was relatively simple, just very time consuming. It ended up taking 3 days to complete the table but I would do it over in a second! This is my completed table:
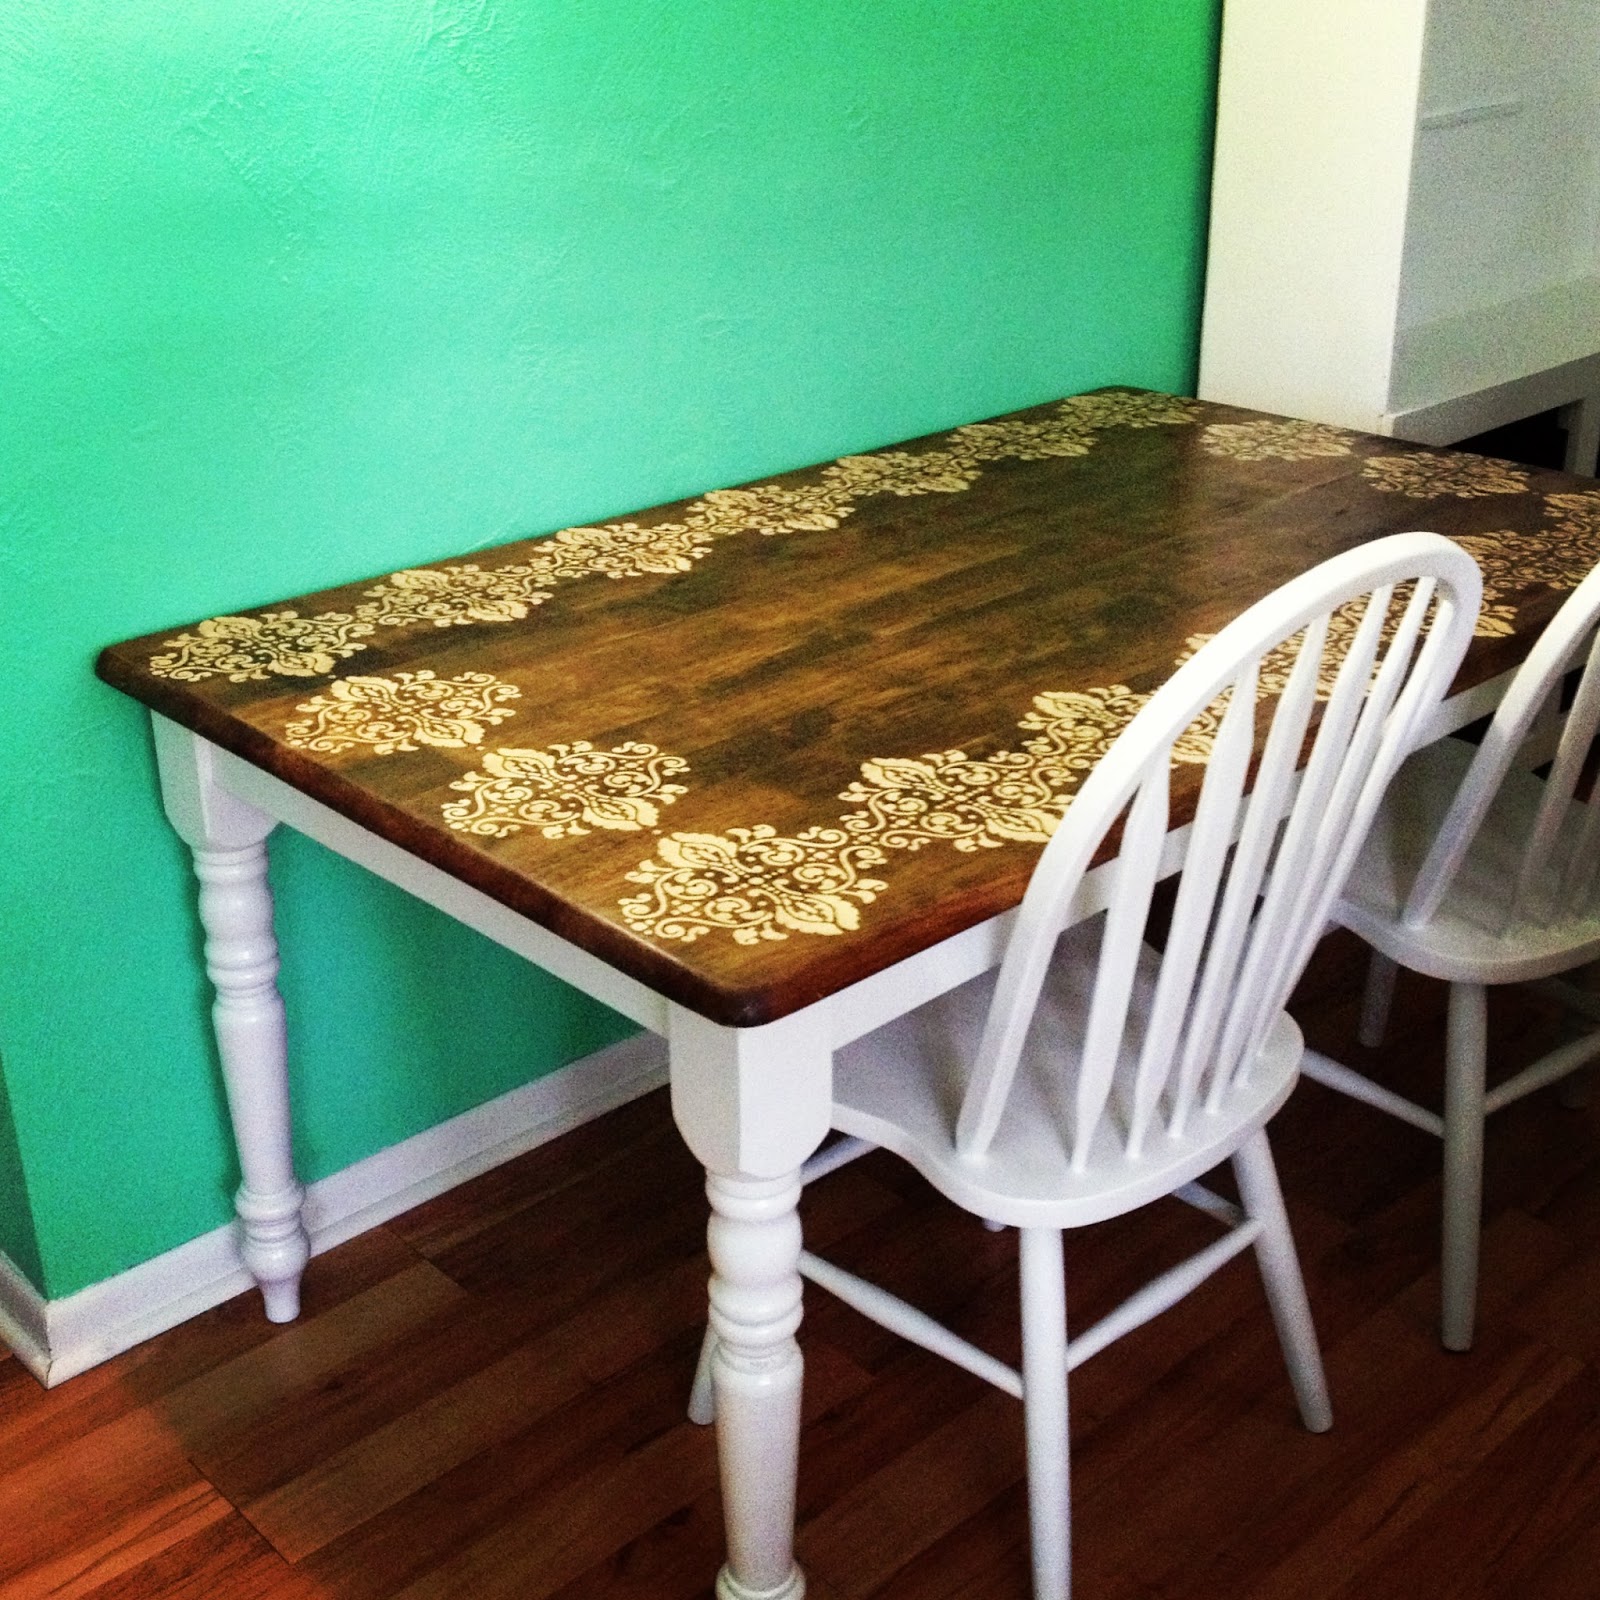
So gorgeous!
Beautiful!
ReplyDeleteI came here after reading your comment on Domestic Imperfection, and I really like your table! I love the choice you made to just edge with the pattern, it's lovely.
ReplyDeleteThank you! I am happy to report that it is holding up very well in my 7 year old's room!
Deletei am in process now of trying to fix a table top i messed up by painting it glossy black (spray) first time. It came out shiny in some spots and not so in others. So I stenciled white on top and was thinking about putting poly on top of it so it will be shiny all over. Was it hard to put on the poly? and what did u use to put on.
Delete